


Details And Settings
2 views · updated 6 hours ago
Settings:
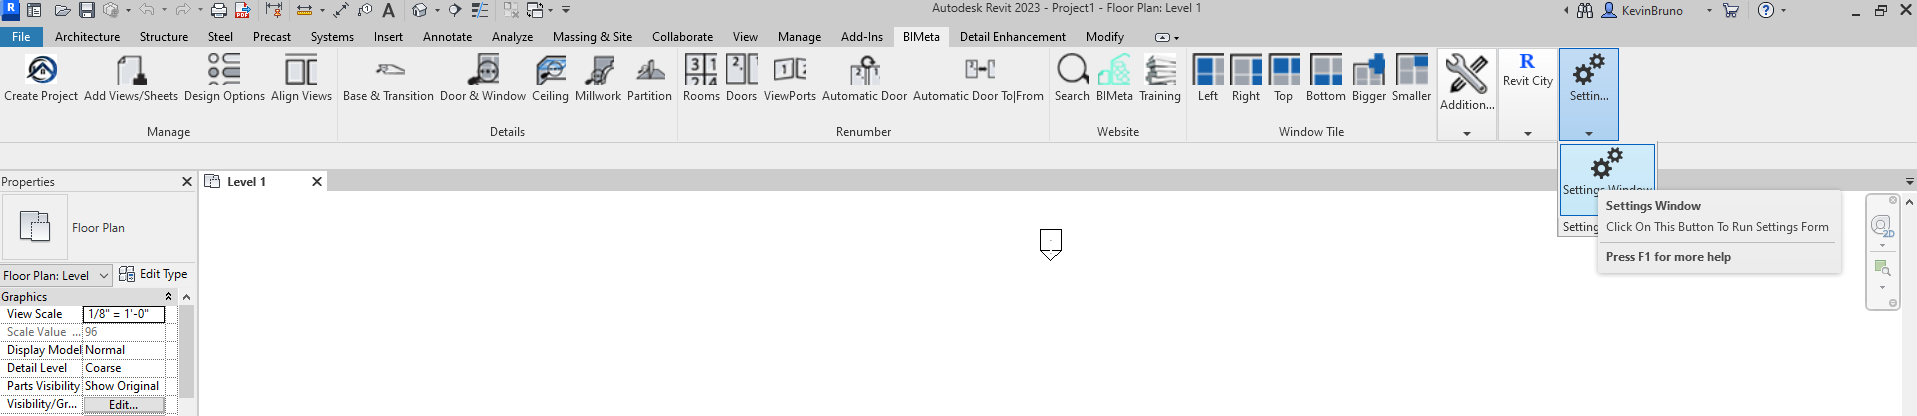
Step 1: To begin, we must first set your detail locations. First, click on the BIMeta toolbar and navigate your way to “Settings Window.
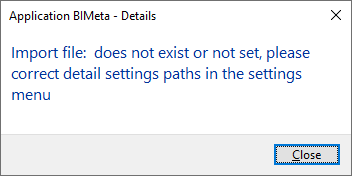
Step 2: Once you have clicked on the “Import Detail Settings”, you will be prompt by a menu to select your default detail setting locations. Please Note: In order to save the default paths, all paths must be valid:
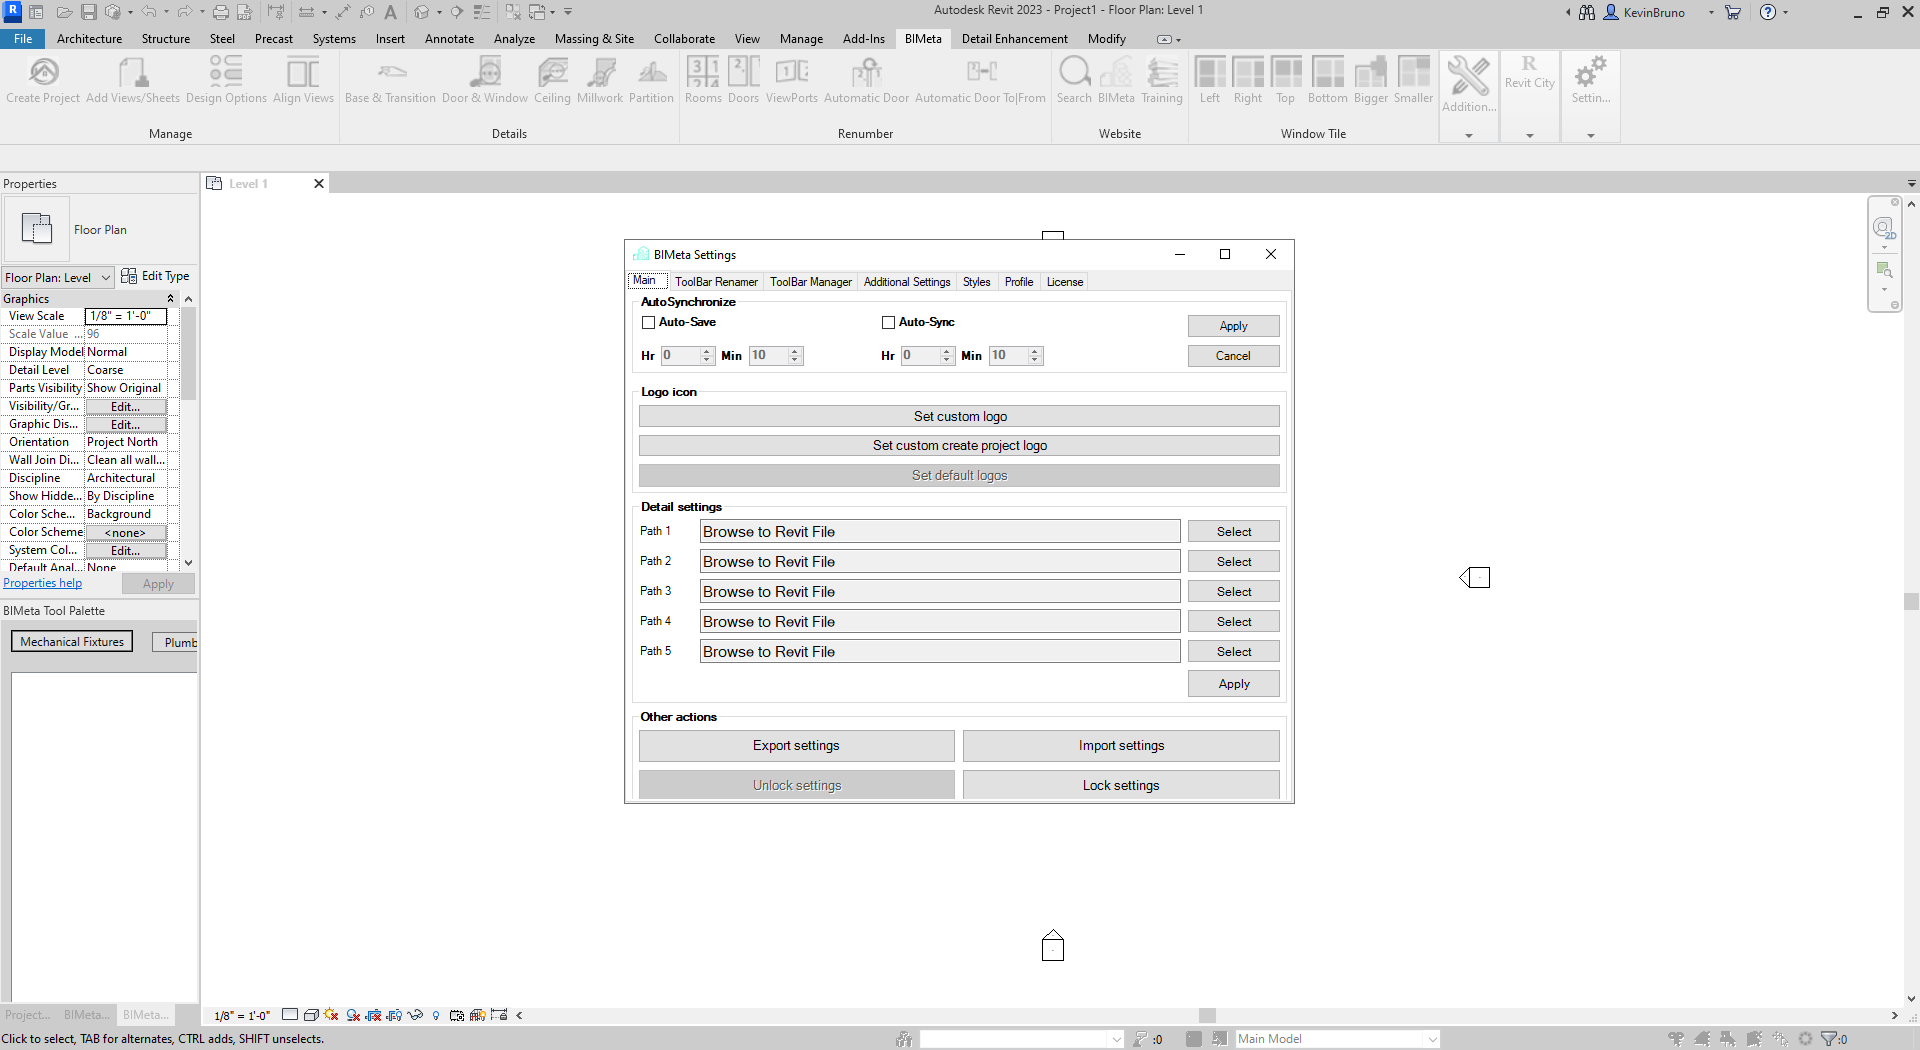 After you have clicked Save, a default menu will appear confirming your settings: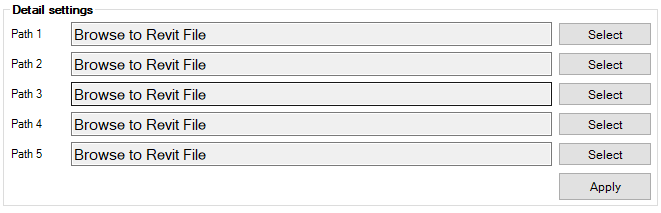
Step 3: Now that you have selected your default path for the detail locations under settings, you may now utilize the detail buttons. Currently, these detail buttons are only applicable to:
- Path 1 = Base And Transition
- Path 2 = Door And Window
- Path 3 = Ceiling
- Path 4 = Millwork
- Path 5 = Partition
However, this does not mean you cannot set alternate detail files. You can adjust the icons, names, and panel selection in the Toolbar Manager:
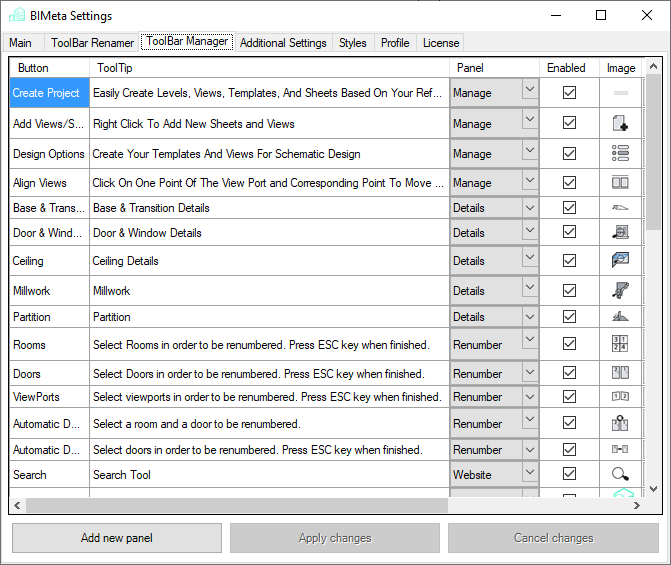
Step 4: Once you have clicked on the any of the above details, you will be greeted by a prompt showing you all the corresponding details and views you can now import into your existing file. Once checked off, click on insert and you are ready to go.

Was this article helpful?
Share