



Punch list: walk the site, track items to closed
17 views · by Kevin J Bruno · updated 5 days ago
Near the end of construction the architect walks the building with the contractor and writes down everything that isn't finished or isn't right yet: a scuffed door frame, a missing outlet cover, a ceiling tile out of line. That list is the punch list. The contractor works through it, says when each item is fixed, and the architect checks and closes it. A clear, complete punch list is usually what stands between the project and substantial completion and final payment. The Punch list tab keeps each walk as its own list, numbers every item across the whole project so "punch 214" is never ambiguous, and tracks each item from open to closed.
How a punch item moves
| Status | Meaning | Who moves it on |
|---|---|---|
| Open | Still to be fixed. | The contractor's representative (or anyone who can respond on the project) marks it Ready for review. The design team can also close it directly. |
| Ready for review | The contractor says it's done; the architect needs to check it. | The design team either Closes it or Send back to Open. |
| Closed | Checked and accepted. | The design team can Send back if it turns out not to be done. |
Where to find it
Open a project, choose the Construction group, then the Punch list tab. Click a list to open it; the breadcrumb (Punch list · walk date) takes you back.
Who can use it
- Everyone who can open the project can see the lists and their items, filter them and print them.
- Starting lists, adding items, closing items and sending them back need permission to manage construction admin: Business Owners, Admins, IT Staff, BIM Managers and Project Managers, plus anyone with the Project Manager or Project Architect role on the project's team.
- Marking items ready needs permission to respond on the project, which managers have and which a Designer, Consultant or Client on the team also has. Add the contractor's representative to the team as a Consultant if you want them to mark items ready themselves.
- A User who is only a viewer on the project sees the lists but no forms or action buttons.
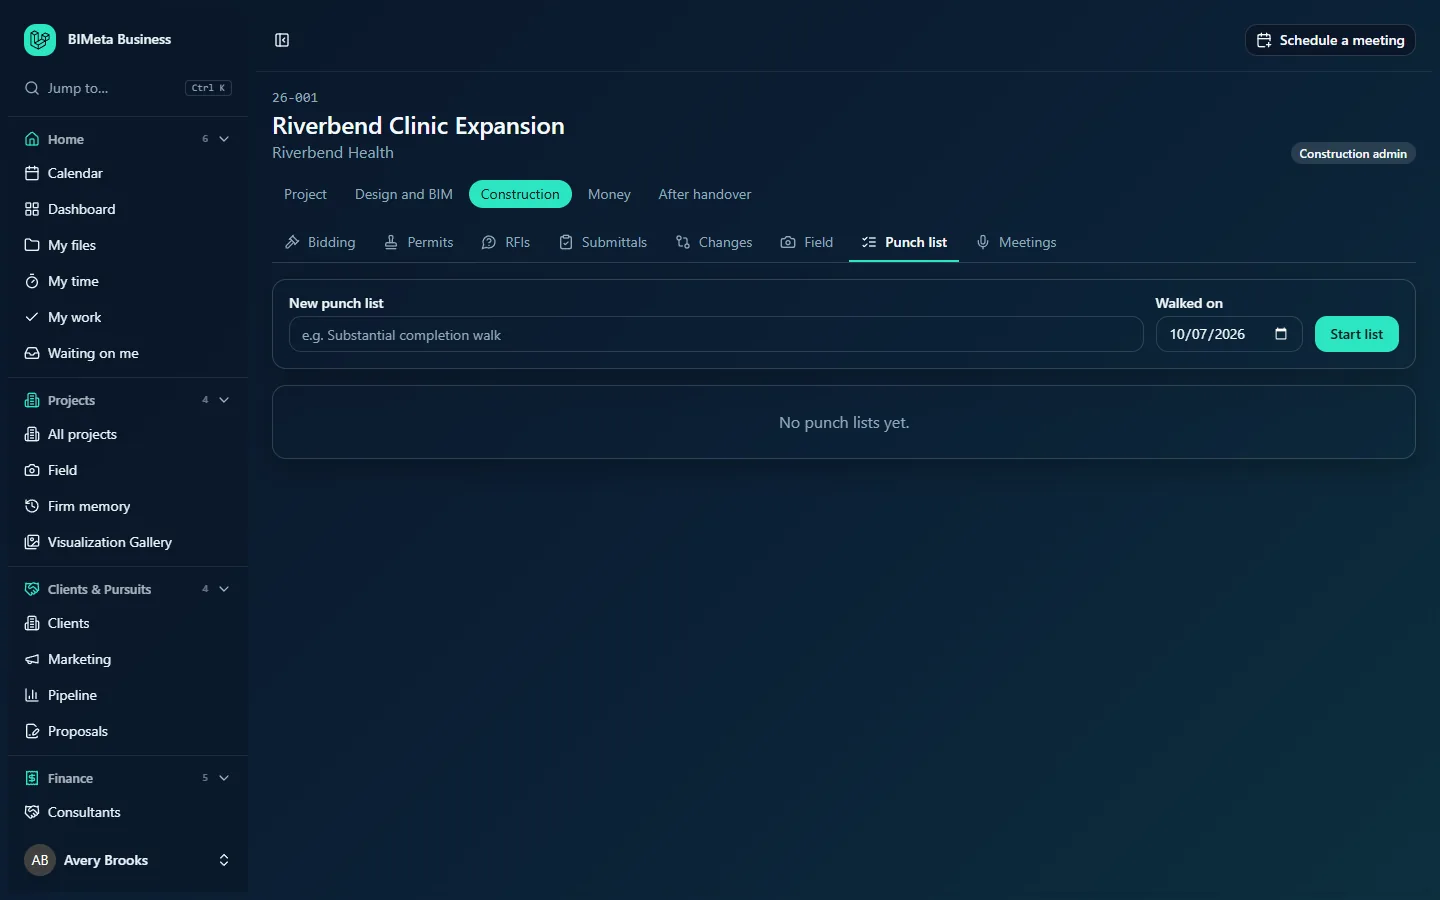
A tour of the Punch list tab
New punch list (managers)
A bar at the top with New punch list (the list's name, e.g. Substantial completion walk), Walked on (today's date to start with) and Start list.
The lists
Each walk appears as a card, newest walk first, showing:
- The list's name and the date it was walked.
- A progress bar showing the share of items that are closed.
- A count line, e.g. 12 open · 3 ready · 40 closed of 55.
Click a card to open the list. With no lists yet, you'll see No punch lists yet.
A tour of a punch list
- Header: the breadcrumb with the walk date, the list's name and a Print button.
- Status filter: All statuses, Open, Ready for review or Closed.
- Trade filter: All trades or one of the trades used on this list (e.g. Painting, Electrical).
- Selection bar: once you tick items, a bar shows "n selected" and the buttons you're allowed to use: Mark ready, Close and Send back.
- The items table: a tick box (the one in the header selects every item shown), the item number, Location, Item (the description, with the sheet number and any note underneath in small text), Trade and Status. Items are listed in number order. With nothing matching you'll see No items here.
- Add items (managers): a large text box, a Sheet picker, a Complete by date and an Add items button.
How to …
Start a punch list for a site walk
- On the Punch list tab, type a name in New punch list (required, up to 160 characters), e.g. Level 2 pre-final walk.
- Set Walked on to the date of the walk (today if left as is).
- Click Start list. The new list opens with the notice "Punch list started. Add the items next."
Add items
You add items by typing or pasting them, one per line, which makes it quick to paste from notes taken on site or from a spreadsheet column.
- In Add items, enter one item per line, either:
location | item | trade, e.g.Room 204 | Touch up paint at door frame | Painting, orlocation | item, or- just the item description on its own.
- Optionally choose a Sheet (the drawing the items relate to) and a Complete by date. Both apply to every item in this batch.
- Click Add items. You'll see "n items added", and the box clears.
Limits: up to 300 items per batch; blank lines are ignored. Locations are kept up to 160 characters, descriptions up to 500 and trades up to 80. Every line must have a description, or nothing in the batch is added and you're told which line is missing one. Each item gets the next number across the whole project, so numbers keep counting up from list to list.
Mark items ready (contractor side)
- Filter to Open (and a trade if useful).
- Tick the items that are fixed.
- Click Mark ready. You'll see "n items updated". Only items that were Open move.
Close items or send them back (design team)
- Filter to Ready for review and check the work on site.
- Tick the items you've accepted and click Close. Open or ready items move to Closed.
- Tick any that aren't right and click Send back. Ready or Closed items return to Open, and their "ready" and "closed" stamps are cleared.
Each move records who did it and when, and is written to the audit log.
Print a list for the contractor
- Set the Status and Trade filters to what you want to send, for example all Open items for the painting subcontractor.
- Click Print. A clean printable list opens in a new tab (firm, project, list name, the trade if filtered, and each item with its number, location, description, trade, status and a Done column for ticking off on site).
- Use your browser's Print to print it or save it as a PDF.
Tips and good to know
- Make one list per walk (e.g. one per floor or one per inspection date). The progress bars then show you at a glance which walks are nearly done.
- Use consistent trade names (Painting, not sometimes Paint) so the Trade filter groups items properly; the filter offers exactly the trades typed on that list.
- Changing a filter clears your selection, so tick items after filtering.
- Items can't be edited or deleted after they're added. If you made a mistake, close the wrong item and add a corrected one.
- Your project's closeout (the Closeout tab in the After handover group) is the next step once the punch list is cleared.
Troubleshooting
I don't see New punch list or Add items.
You need permission to manage construction admin on this project. Ask the project manager to give you the Project Manager or Project Architect role on the project's Team tab.
"Only the design team can close items or send them back."
You can mark items ready but not close them. A project manager or architect has to verify and close them.
I clicked Close but fewer items moved than I selected.
Only items in a status that allows the move are changed: Mark ready only moves Open items; Close moves Open and Ready items; Send back moves Ready and Closed items.
"Add up to 300 items at a time."
Split your list into two or more pastes.
Was this article helpful?
Share