


Knowledge base: write and publish an article
17 views · by Kevin J Bruno · updated 17 hours ago
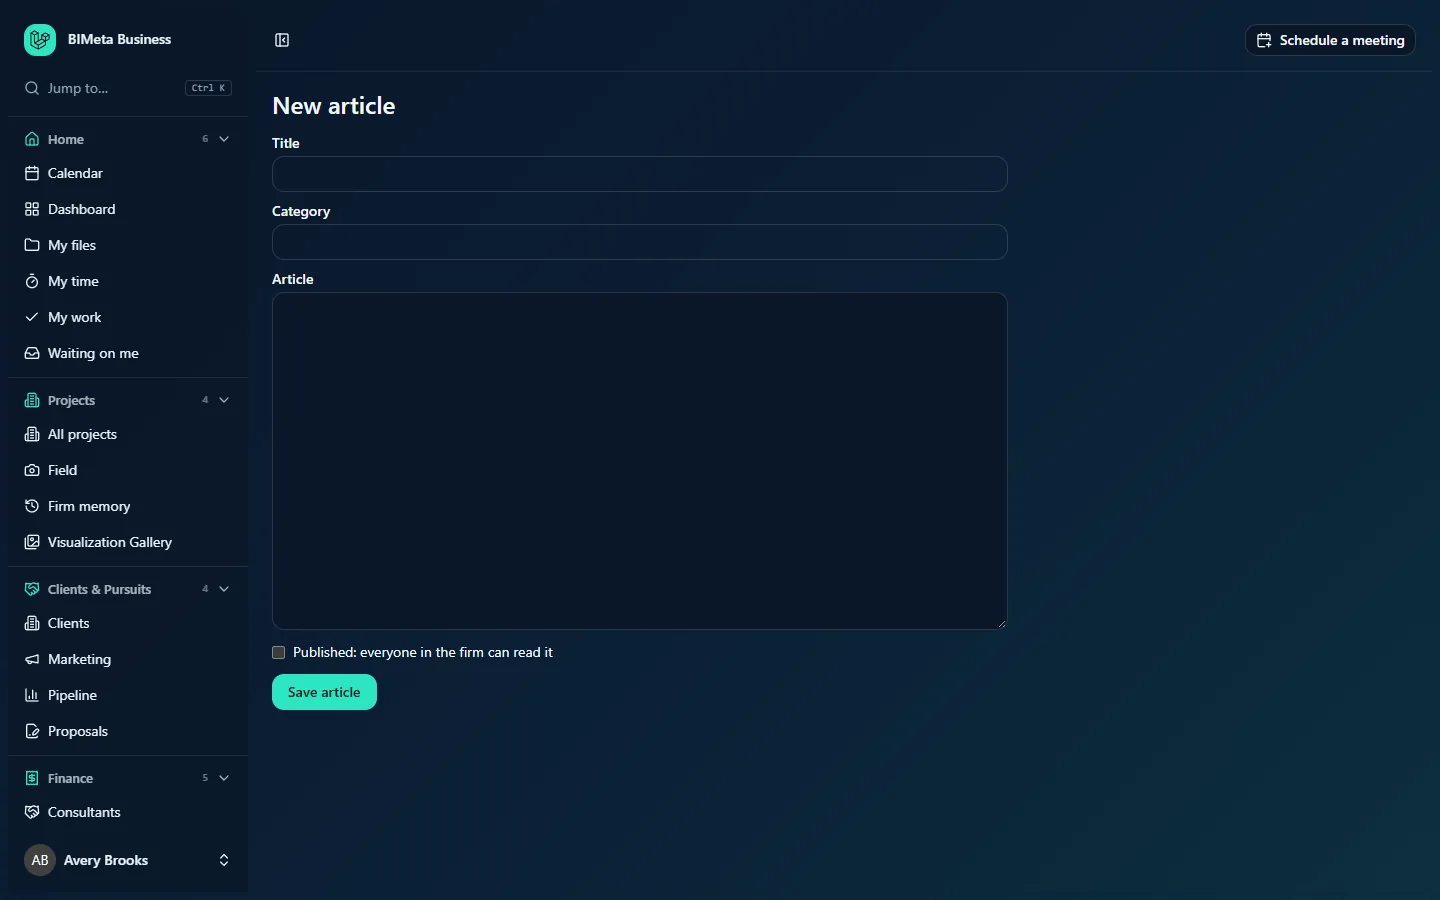
The New article page is where knowledge base editors write how-to articles for the firm's Knowledge base. The same screen, titled Edit article, is used to change an existing article, publish or unpublish it, or delete it. An article stays a private draft until you tick Published; only then can the rest of the firm find it.
Where to find it
- Sidebar → Firm → Knowledge base, then the New article button at the top right.
- To change an existing article, open it from the knowledge base and click Edit.
Who can use it
Only knowledge base editors. By default those are Business Owners, Admins and IT Staff. BIM Managers and Users don't see the New article or Edit buttons and can't open this page.
A tour of the page
- Title (required): up to 200 characters. Write it the way people will search, for example Connect to the office VPN from home rather than VPN. Titles are also what support tickets are matched against when suggesting articles.
- Category (optional): up to 80 characters. As you type, the box suggests categories already used on other articles; pick one of those to keep the category filter tidy, or type a new one to start a category.
- Article (required): the body, as plain text, up to 100,000 characters. Line breaks and blank lines are kept exactly as typed, but there is no bold, headings or links formatting, so use numbered lines and short paragraphs to make steps easy to follow.
- Published: everyone in the firm can read it: tick it to make the article visible to all staff. Leave it unticked to keep the article as a Draft that only editors can see.
- Save article: saves and takes you to the article's page, with the message Article saved.
- Delete article (on Edit article only): deletes the article.
How to…
Write and publish a new article
- Open Firm → Knowledge base and click New article.
- Enter a Title and choose or type a Category.
- Write the Article. A good pattern is: one line saying who it's for, numbered steps, then what to do if it doesn't work (usually "open a Support ticket under IT & accounts").
- Tick Published if it's ready, or leave it unticked to finish later.
- Click Save article. You land on the article's page to check how it reads.
Save a draft and publish later
- Save with Published unticked. The article shows with a Draft badge in the list, for editors only.
- When it's ready, open it, click Edit, tick Published and click Save article.
Update an article
- Open the article and click Edit.
- Make your changes and click Save article. The article's Updated line now shows today's date and your name. Its view and vote counts are kept.
Take an article down
To hide it but keep it, edit it, untick Published and save. To remove it for good, click Delete article on the edit page. Delete happens immediately, without a confirmation question, and can't be undone, so unpublishing is usually the safer choice.
Tips and good to know
- Changing an article's title later doesn't break links people have saved to it.
- Creating, updating and deleting articles is recorded in the audit log.
- Watch the Did this help? counts and the view counts on the list to see which articles people rely on and which need work.
- When you answer the same support ticket twice, write the answer up as an article; future tickets with similar subjects will suggest it automatically.
Troubleshooting
I get "Write the article first."
The Article box is empty (spaces alone don't count). Add the text and save again.
Staff can't see my new article.
It was saved without Published ticked. Edit it, tick the box and save.
Was this article helpful?
Share