



Managing one person: roles, deactivation and two-factor
18 views · by Kevin J Bruno · updated 23 hours ago
Each person in your firm has an access page. It's where you change their roles (for example when someone is promoted to Project Manager), switch their account off when they leave, switch it back on, resend an invitation they never used, and reset two-factor when they lose their phone or security key. If your firm has added custom fields for staff, they're filled in here too.
Where to find it
Sidebar → Admin → Settings, then People & access in the People and access section. (The Settings page gathers the firm's settings pages in one place; you can also type in its Search settings box.) Then click the person's name in the table. The breadcrumb in the top bar (People & access) takes you back to the list; the ← Settings link above the person's name takes you back to the Settings page.
Who can use it
- Only people who can manage accounts can open this page: Business Owner, Admin, IT Staff and Human Resources by default.
- Your own page shows only your name, email and badges, with the note You can't change your own access here. Ask another Admin. This stops anyone raising their own access or locking themselves out.
- You can only save changes for people whose roles all carry no more access than yours, and only give roles that carry no more access than yours. For example, IT Staff can open a Business Owner's page, but saving roles or deactivating shows "This person has more access than you, so you can't change their account." See People & access: invite people and manage their accounts for the full table of who can change whom.
- Custom fields on staff can be edited by anyone who can manage people.
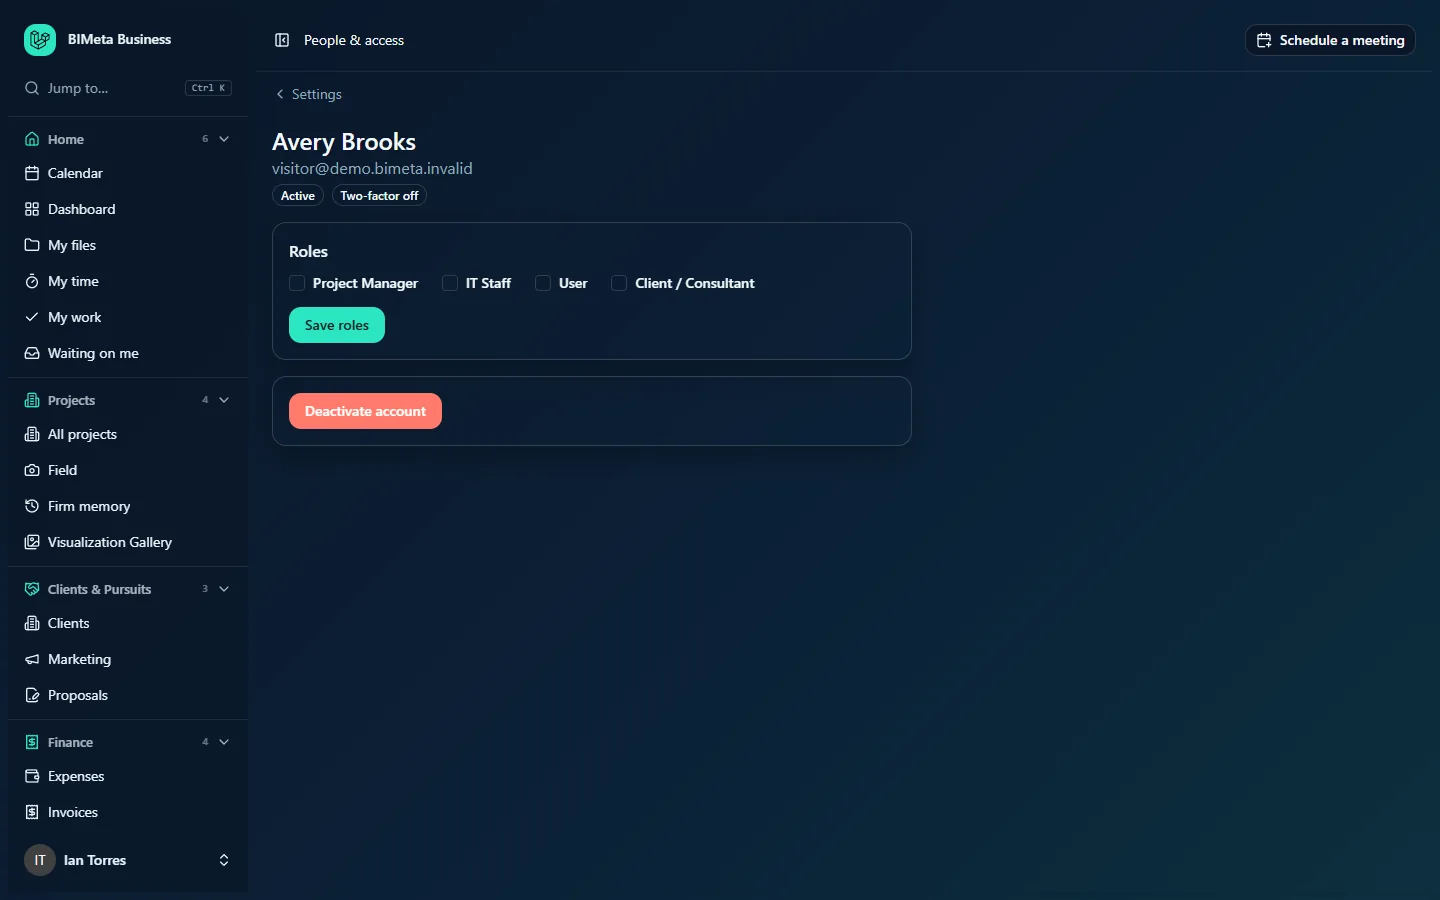
Above: IT Staff (Ian Torres) looking at the Business Owner's page at Northlight Architects. The role checkboxes only list the roles IT Staff may give.
A tour of the page
Header
- The person's name and email address.
- A status badge: Active, Invited or Deactivated.
- A two-factor badge: Two-factor on (they've set up an authenticator app or a passkey) or Two-factor off.
Roles
One checkbox per role you're allowed to give, with the person's current roles ticked. Save roles saves the ticked set: ticking adds a role, unticking removes it.
Account actions
The buttons depend on the person's status:
| Button | When you see it | What it does |
|---|---|---|
| Resend invitation | Status is Invited | Sends a fresh invitation email with a new link, valid for 7 days. Any earlier link stops working. |
| Deactivate account (red) | Status is Active | Switches the account off and signs the person out. |
| Reactivate account | Status is Deactivated | Switches the account back on. |
| Reset two-factor | Two-factor is on | Removes their authenticator app, recovery codes and passkeys so they set two-factor up again. |
More details
If your firm has added custom fields for Staff under Admin → Settings → Custom fields, a More details card lists them, for example an employee number or start date. Click Edit to fill them in and Save. The card doesn't appear when there are no staff fields.
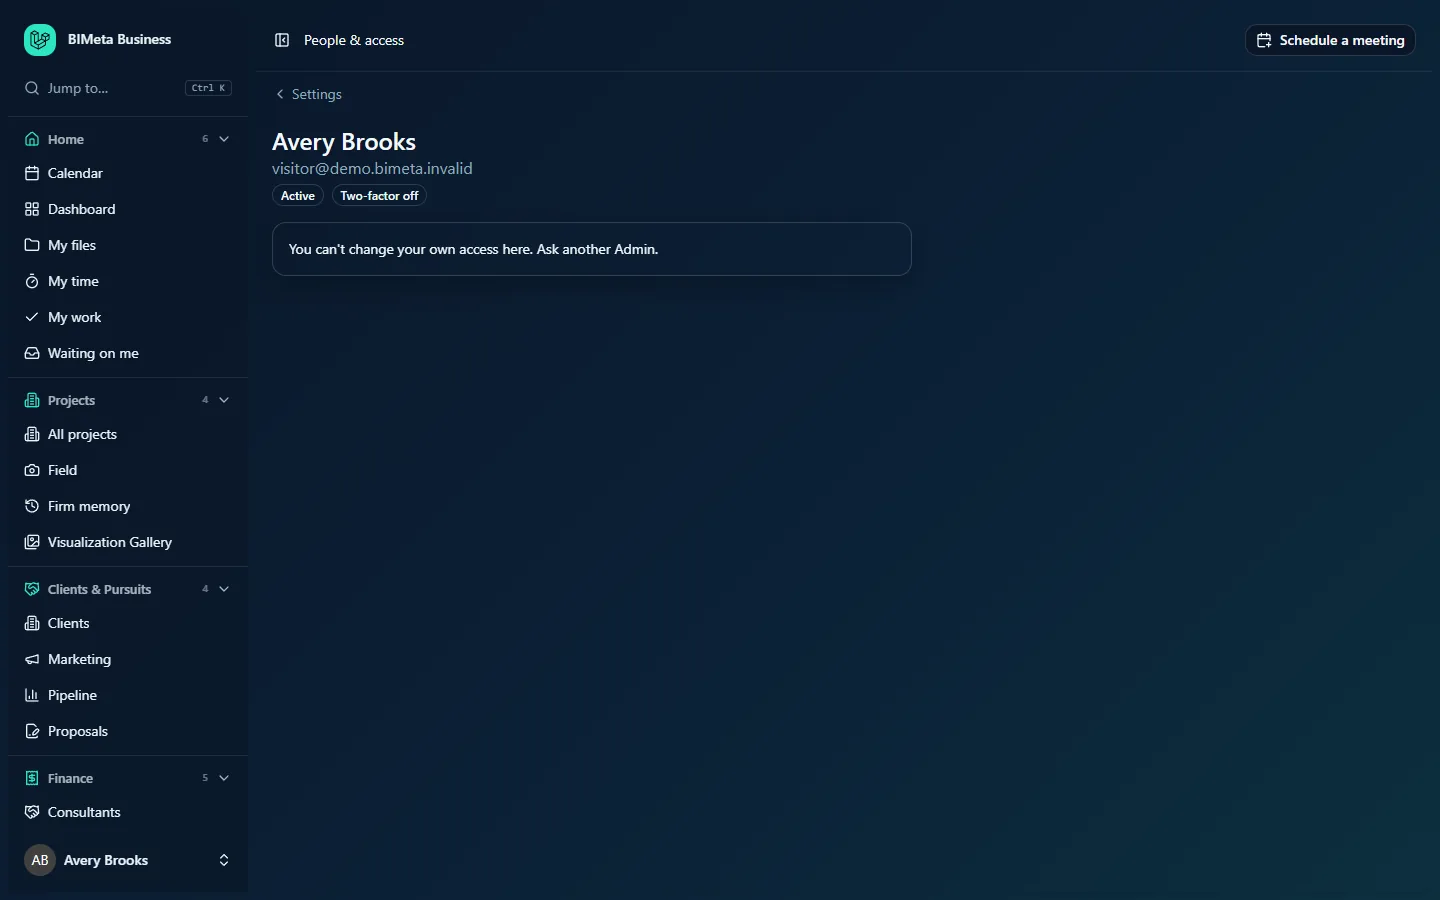
Above: a Business Owner looking at their own page, where nothing can be changed.
How to change someone's roles
- Open the person's page.
- Under Roles, tick the roles they should have and untick those they shouldn't. Keep at least one.
- Click Save roles. You'll see Roles saved.
- The change takes effect on the person's next click: their menu, buttons and pages follow their new roles at once, with no need to sign out.
- If a new role requires two-factor sign-in and they don't have it yet, they're asked to set it up before they can carry on.
- Roles the person holds that you're not allowed to give aren't shown, and you can't save at all for someone who has a role with more access than yours.
- The Audit log records
people.roles_changedwith the roles before and after.
How to deactivate someone who leaves
- Open the person's page.
- Click Deactivate account. There's no extra confirmation, so check you have the right person.
- You'll see Account deactivated and signed out.
What deactivation does:
- They're signed out of the portal on their next request and can't sign in again, with a password, passkey or single sign-on.
- "Remember me" sign-ins are cancelled.
- Sign-ins from their desktop apps and any API keys they created stop working, and stay stopped even if you reactivate them later (they sign in to the apps again).
- Nothing they made is deleted: timesheets, files, RFIs, approvals and comments keep their name.
- The Audit log records
people.deactivated.
For a full leaver process (returning equipment, removing access in other systems, final pay), HR can use People → HR, Onboarding tab, which has offboarding checklists. If the person later asks for their data to be erased, deactivate them first, then use Admin → Settings → Privacy requests.
How to reactivate someone
- Open the person's page; the badge says Deactivated.
- Click Reactivate account. You'll see Account reactivated.
- They can sign in again with their old password. Their roles are as they were. The Audit log records
people.reactivated.
How to reset two-factor (lost phone or key)
- Confirm who you're talking to (for example on a video call). Resetting two-factor removes a layer of protection from their account.
- Open their page and click Reset two-factor.
- You'll see Two-factor reset. They'll set it up again at their next sign-in.
- They sign in with their password. If their role requires two-factor, they must set up a new authenticator app or passkey before they can continue.
The Audit log records people.2fa_reset.
How to resend an invitation
- Open the page of someone whose badge says Invited.
- Click Resend invitation. You'll see New invitation sent. The earlier link no longer works.
If the person has already accepted, you'll see "This person has already accepted their invitation." You can't deactivate someone who is still Invited. An unused invitation simply stops working after 7 days; until the person accepts, they can't see anything in the portal.
Tips and good to know
- Deactivate, don't delete. There's no delete button: the account stays so the firm's records stay readable.
- Changing roles here never touches project roles. To take someone off a project, use that project's Team tab.
- Your firm's IT Staff can also require two-factor for everyone under Admin → IT, Security tab, regardless of role.
- Passkeys count as two-factor: someone who signs in with a passkey shows Two-factor on.
- If your firm requires every team member to pass a background check, a person who hasn't passed one is sent to their own check before they can use the portal, whatever roles you give them. Business Owners and Admins follow each person's check under Admin → Settings → Background checks; see Background checks: check your team, new hires and vendors.
Troubleshooting
Why does it say "You can't change your own access here"?
Nobody can change their own roles or deactivate themselves. Ask another Admin or a Business Owner.
I clicked Save roles and got "This person has more access than you".
One of the person's roles includes a permission you don't have. Only someone with at least that much access, usually a Business Owner, can change them.
There's no Reset two-factor button.
The person doesn't have two-factor set up, so there's nothing to reset.
There's no Deactivate button.
The person is still Invited. Deactivation is only for accounts that have been accepted.
Was this article helpful?
Share